
 AC серия
 Электрические тепловые завесы Wing White Белые
 Водяные тепловые завесы WING White Белые
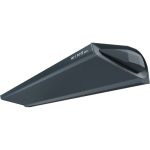 Тепловые завесы Wing Dark Черные
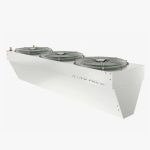 Wing PRO тепловые завесы
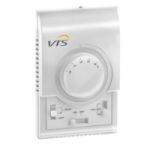
1. Understanding the Importance of Micro-Adjustments in Data Visualization Alignment
a) Why Small Tweaks Have a Big Impact on Data Clarity
Small positional adjustments—measured in pixels or sub-pixel units—can drastically enhance the readability, professionalism, and interpretability of visualizations. Precise alignment reduces visual noise, prevents misinterpretation, and ensures that the viewer’s focus is directed correctly. For example, slight misalignments in bar charts can distort perceived differences, leading to flawed insights. To achieve this, understanding the exact pixel grid and how your visualization tool renders elements is essential. Use high-resolution displays and zoom-in features to detect misalignments that are invisible at standard zoom levels.
b) Case Study: Misalignment Consequences in Business Dashboards
Consider a sales dashboard where multiple KPI indicators are aligned but subtly offset. These misalignments can cause cognitive dissonance, reduce trust in data integrity, and obscure comparison points. For instance, a misaligned bar in a bar chart might make the data appear skewed or give an impression of inconsistency, which can influence decision-making adversely. In a high-stakes environment, even a 1-pixel shift can impact stakeholder perceptions—highlighting the necessity for micro-adjustments.
c) Overview of Common Alignment Challenges in Visual Tools
- Disparate coordinate systems between layers or elements.
- Inconsistent padding, margins, or spacing due to default styles.
- Limited snapping or grid features causing manual misalignments.
- Responsive design adjustments that shift elements unpredictably.
2. Preparing Your Data and Visualization Environment for Precise Adjustments
a) Ensuring Data Consistency and Cleanliness Before Adjustments
Before fine-tuning visual elements, verify that your data is free from anomalies that could skew layout decisions. Use data validation scripts to eliminate outliers, duplicate entries, or inconsistent units. Clean data ensures that visual spacing reflects actual data differences rather than artifacts, simplifying alignment tasks. For example, normalize date formats and numeric precision to avoid miscalculations in position calculations.
b) Setting Up the Visualization Workspace for Fine-Tuning
Configure your design environment with a high-resolution display and enable grid and snap-to-grid features. Set grid size to match your pixel density — for instance, a 1px or 0.5px grid for sub-pixel adjustments. Enable rulers and guides to facilitate precise placement. Use a version control system or snapshot feature to track incremental changes, allowing easy rollback if needed.
c) Tools and Software Features Supporting Micro-Adjustments
- Adobe Illustrator / XD / Figma: Use pixel-perfect mode, numerical input, and smart guides.
- Tableau / Power BI: Leverage custom positioning, precise sizing, and alignment tools; consider scripting extensions for automation.
- Custom Scripts: Use JavaScript or Python automation to set exact coordinates and spacing dynamically.
3. Techniques for Implementing Precise Micro-Adjustments
a) Using Pixel-Level Grid and Snap-to-Grid Features
Activate pixel grid overlays in your design tool. For example, in Figma, set the grid to 1px and enable the snap-to-grid feature. When moving elements, watch for indicator lines or snapping cues that lock elements into exact pixel positions. For finer control, combine this with zooming into 200-400% to detect sub-pixel misalignments. Use keyboard arrow keys for incremental moves, which provide more control than mouse dragging.
b) Applying Numerical Input for Exact Positioning (e.g., X and Y coordinates)
Most advanced visualization tools allow direct input of position values. For instance, select an element, then input precise X and Y coordinates in the properties panel. Use decimal values to achieve sub-pixel accuracy (e.g., X=150.25). For dynamic data-driven visualizations, leverage scripting APIs to set these values programmatically, ensuring consistent placement across updates.
c) Adjusting Margins, Padding, and Spacing with Sub-Pixel Precision
Instead of relying solely on default spacing, manually set margins and paddings using exact pixel or fraction values. For example, in CSS-based visualizations, specify margin: 2.75px; or padding: 1.5px;. Use CSS variables or constants to maintain consistency. When working within software like Adobe XD, input precise numerical values in the spacing fields. This ensures elements align perfectly regardless of screen resolution or scaling.
d) Leveraging Custom Guides and Alignment Lines for Fine Tuning
Create custom guides aligned to specific pixel coordinates. Drag guides to exact positions, then snap elements to these guides. For enhanced precision, use multiple guides to establish a grid or reference points. In tools like Power BI, use the alignment and distribution features combined with manual nudging for micro-tuning. For repetitive tasks, consider scripting guide placements and element alignments for consistency.
4. Step-by-Step Guide to Fine-Tuning Data Elements in Visualization
a) Isolating Specific Data Points or Elements for Adjustment
Use selection tools to target individual bars, points, or labels. In layered environments, lock other elements to prevent accidental movement. For example, in Excel or Tableau, click on the specific bar or data point, then switch to precise positioning mode (e.g., property panel or scripting interface). Isolating the element reduces ambiguity and allows for focused adjustments without affecting surrounding components.
b) Incremental Adjustment Workflow: Small Changes, Continuous Preview
Adopt a cycle: move an element by a small pixel increment (e.g., 0.25px), then preview in real-time. Use high zoom levels and toggle grid visibility to assess alignment. Document each change’s coordinate for reproducibility. Repeat this process iteratively, aiming for an alignment that appears seamless at all zoom levels and device resolutions.
c) Example: Aligning Multiple Bars in a Bar Chart for Perfect Symmetry
Suppose you have a grouped bar chart with inconsistent bar spacing. Select all bars, then use the numerical input to set their X-coordinates to evenly spaced values, e.g., X=100px, 125px, 150px, etc. Use guide lines to mark desired positions, then nudge bars with arrow keys in 0.1px increments. Verify alignment by toggling visibility of guides and inspecting at high zoom levels. Adjust until all bars sit precisely on the grid lines.
d) Verifying Alignment with Automated and Manual Checks
Combine visual inspection with automated tools like pixel-perfect overlay layers or validation scripts. For example, export the visualization, then overlay it on a grid or use image analysis software to detect misalignments. In dynamic dashboards, run scripts periodically to compare element positions against expected coordinates, flagging deviations for correction.
5. Addressing Common Pitfalls and Mistakes in Micro-Adjustments
a) Over-Adjusting and Losing Overall Visual Consistency
Focus on the overall harmony of the visualization. Avoid chasing pixel perfection at the expense of clarity. Establish a baseline alignment grid or style guide and limit micro-adjustments to critical elements. Use staging environments to test adjustments without disrupting end-user views.
b) Ignoring Device and Screen Resolution Variations
Test your visualizations on multiple devices and resolutions. Use browser developer tools or device emulators to simulate different environments. Adjust your layout using relative units (%, em, rem) combined with pixel adjustments to maintain consistency across screens.
c) Failing to Document Adjustment Settings for Reproducibility
Maintain a detailed log of all position changes, including pixel values, guide placements, and scripts used. Use version control systems to track changes over time. This documentation ensures that adjustments can be replicated or rolled back as needed, especially in collaborative environments.
d) Troubleshooting Non-Responsive Adjustment Tools
If your adjustment tools do not respond as expected, verify that your software is up to date and that snapping or grid features are enabled. Clear cache, restart the application, and reset preferences if needed. For scripting issues, check for syntax errors or conflicts with other plugins. Use debugging tools or console logs to pinpoint causes of non-responsiveness.
6. Advanced Techniques for Dynamic and Responsive Alignment
a) Creating Responsive Layouts that Adapt to Data Changes
Design with flexible units like percentages, viewport units, or CSS Flexbox/Grid to allow elements to adapt dynamically. Combine these with media queries and JavaScript adjustments for fine control. For example, set bar widths as max(10%, 50px) to ensure they scale appropriately but maintain minimum size for clarity.
b) Implementing Adjustment Scripts or Plugins for Automation
Utilize scripting APIs to automate alignment tasks. For instance, in D3.js, set element attributes programmatically: .attr('x', function(d, i) { return i * 20 + 100.25; }). Develop custom plugins that periodically check and correct misalignments based on predefined rules, reducing manual effort and increasing consistency.
c) Using Anchors and Constraints for Maintaining Alignment During Updates
Set anchors relative to key elements or container edges. Use constraints like «stick to top-left» or «centered» with sub-pixel offsets. In code, dynamically calculate offsets based on container size changes. This approach ensures elements stay aligned even as data or layout dimensions change, facilitating real-time responsiveness.
d) Case Study: Real-Time Adjustment in Interactive Dashboards
In an interactive sales dashboard, user filters dynamically change data ranges, causing layout shifts. Implement scripts that listen to data change events and adjust element positions with sub-pixel precision in real-time. For example, if a filter shrinks a chart container, automatically recalculate the X and Y positions of annotations and legends to maintain perfect alignment. This ensures the dashboard remains visually coherent and professional regardless of data variations.
7. Validating and Finalizing Precise Data Visualization Alignment
a) Conducting Cross-Device and Cross-Resolution Testing
Use tools like BrowserStack or Sauce Labs to simulate various devices and resolutions. Verify that all elements align correctly and maintain visual integrity. Adjust for any discrepancies by refining your scripts, guide placements, or relative units, ensuring consistent user experience across platforms.
b) Utilizing Visual Inspection and Automated Validation Tools
Employ overlay grids, image analysis software, or custom scripts to detect misalignments at the pixel level. For example, overlay a semi-transparent grid on exported images to visually confirm element placement. Automate validation with scripts that compare current positions against stored benchmarks, flagging deviations for review.